How and How Long:
- Print and Cut: Download the PDF using link below and print out at least 5 copies. You might as well make it 6 or 7 if you're new to this type of stuff. The thicker the paper the better. In fact, I'm using Bristol board which is basically card stock.
Once you've printed them out, cut out around the whole shape and the little black line in the middle.
Note: the file looks different because I updated it with the instructions on the page itself.
http://www.instructables.com/id/Paper-Gold-Star-Tree-Topper/step2/Print-and-cut/
- Fold: The four dotted lines coming out from the top will be valley folds, folds coming towards you. The two other folds are mountain folds, folds going away from you. Be careful to make the folds in the right spot and crease the fold to make it clean.
In the PDF, the folds are marked with red and blue lines. The blue lines are valley folds and the red lines are mountain folds.
Since I'm using thick paper, I used a bone folder to score the paper first. This helps a lot and is well worth the few bucks it costs.
- Gluing: For each piece, glue the small flap on one side to the opposite side. The result will be one point of the ultimate star. Do this first for all 5 pieces. I used Aleene's Tacky Glue for this.
With the pieces ready to go, apply glue to the top of the two flaps that are now sticking off of the bottom of the star point. Connect the star point to the next star point, as sen in the second picture, and press together until the glue is holding it together. Repeat until you have all 5 pieces together, like in the third picture.
- Completing the Star: Here's the tricky part, getting it all to come together. Since you can't get your hands inside any more you'll have to compromise.
I've seen other ways of doing this, but for me, I only glue the bottom inch or so of the remaining flaps and then squeeze that together. It works.
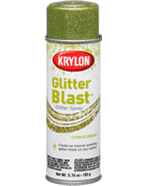
- Paint! For the shininess to make the star extra glorious, I used three types of paint, in this order:
Krylon gold metallic and
Krylon gold Glitter Blast.
As always, make sure to use spraypaint in a well-ventilated area. I also strongly recommend using a respirator. I never paint, even a touch-up, without one.
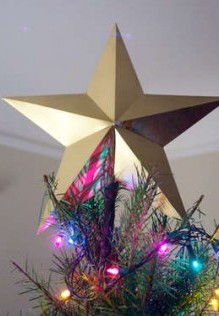
- Top the Tree: I cut out a small hole in the back bottom of the star and stuck the top of the tree inside the star. This works fine in my living room since the tree is in a corner. If the tree is more in the middle of the room, try cutting a notch at the bottom seam so that the tree is right in the middle of the star.
Thanks for checking this out and happy holidays!
Approximate project time: 1 hour.
|